
Integrate CircleCI with Slack for Notifications
Authored by: Pankaj Thakur
This is a follow-up article to my last article Build & Deploy your software using CircleCI please check it out if you haven’t.
In this article, we’ll integrate Slack notification for deployment status, they’ve made this integration a little complex by adding OAuth tokens.
This integration requires changes on Slack, CircleCI local config, and add environment variable on CircleCI Dashboard.
First, we’ll start with implementing changes on the local circleci config.
version: 2.1orbs:
  heroku: circleci/heroku@0.0.10
  slack: circleci/slack@4.1jobs:
  build:
    docker:
      - image: circleci/node:10.16.3
    working_directory: ~/search-yc-top-companies
    steps:
      - checkout
      # install dependencies
      - run:
          name: Install Dependencies
          command: npm install
      - run:
          name: Build
          command: npm run build
  status:
    docker:
      - image: cimg/base:stable
    steps:
      - run: echo "Sending status"
      - slack/notify:
          event: fail
          template: basic_fail_1
      - slack/notify:
          event: pass
          template: success_tagged_deploy_1workflows:
  heroku_deploy:
    jobs:
      - build
      - heroku/deploy-via-git: # Use the pre-configured job, deploy-via-git
          requires:
            - build
          filters:
            branches:
              only: master
      - status:
          requires:
            - build
            - heroku/deploy-via-git
Your CircleCI config file should look like this, in this, we have added Slack orb to aid us which makes complex things easy to use and we have status job for it that waits for both the other jobs to finish and then send a deployment status to Slack channel.
As a next step, we’ll create a Slack app, get Bot OAuth token with appropriate scopes and then invite that bot into our slack channel.
Hoping you already have a Slack channel created where you want your CircleCI notification, if not please create one before moving forward.
Follow the below steps:
- Go to Slack Apps.
- Click on
Create New Appand thenFrom Scratch. - Give a name to your Slack app and select your workspace.
- Select
BotsinAdd features and functionality. - Next, click on
Review scopes to addand go to the Scopes section and under that Add permissions for your Bot Token Scopes. - Add
chat:write,users:writepermissions. - Now scroll up to section OAuth Tokens for Your Workspace and there you’ll see Bot User OAuth token, this we’ll be using as Access token so copy it.
- After that go back to Basic Information under Settings on the left menu.
- Install the App into your workspace.

This is an important step, go to your slack channel and invite your app bot into it. You can do it by runing this
/invite @app_namein your slack channel
Now for the last step, we have to add Slack Access Token and default channel to CircleCI environment variables.
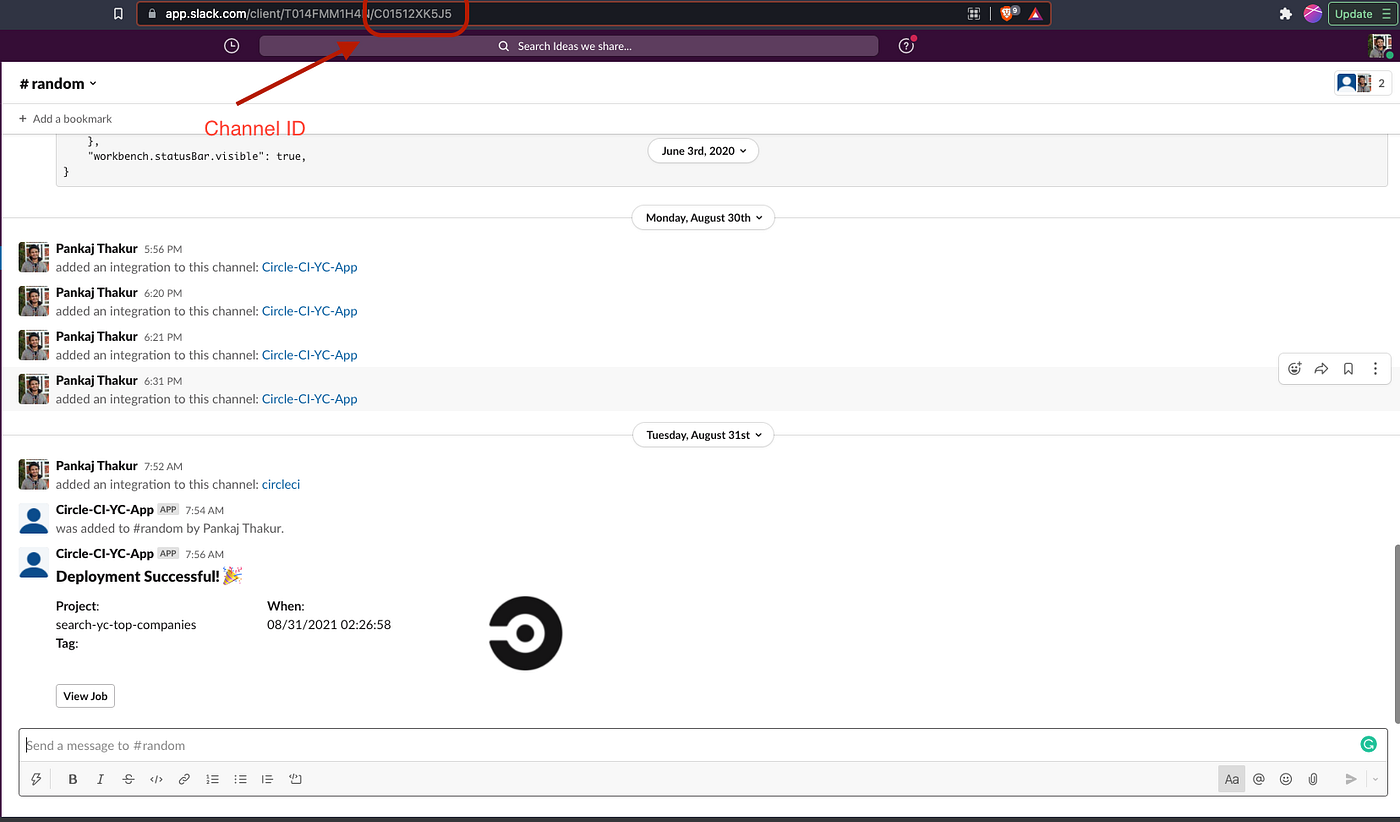
I hope the above steps must have provided you with an OAuth token that we need for SLACK_ACCESS_TOKEN and for channel Id you can get by opening the slack channel in the browser and copy the last part that is channel id, need to add that as SLACK_DEFAULT_CHANNEL .
Now we’ll go through the steps which will help us add slack variables to CircleCI.
- Go to Project Settings and Click Environment Variables
- Add
SLACK_DEFAULT_TOKENas name and access token as value. - Next, add
SLACK_DEFAULT_CHANNELas name and channel Id - Go back to the project and Run the Pipeline manually or trigger it by pushing a change to your Github repo.
After a while, you should receive a notification on your slack channel with a success or failure status. 😊
I hope you guys have enjoyed this article as I have enjoyed writing it.
Stay tuned, we’ll be posting more articles like this once a while, also you can check my website mountainfirefly.dev where I have written a lot of articles like this.
You can ping me on Twitter @mountainfirefly if you face any issues while following this article.