Build & Deploy your software using CircleCI
Authored by: Pankaj Thakur
In this article, we’ll be getting familiar with CircleCI and how we can use it to automate our deployment. You can perform all the steps via CircleCi that any software requires to go to production i.e build, test, and deploy. We’ll be skipping the test step in this post.
Objective
- Make you familiar with CircleCI.
- Build a React project on the CircleCI environment.
- Deploy the React Project on Heroku Server.
What is CircleCI?
CircleCI is a modern tool for Continuous Integration and Continuous Deployment (CI/CD) of your project. You can set it up in your personal cloud and use it for a limited time.
You can create an account on CircleCI by visiting https://circleci.com/vcs-authorize/ and login in with Github or Bitbucket.
Logging in by Github or Bitbucket asks for permissions to access your repositories and automatically imports all of your repos to the CircleCI dashboard.
Next, let me just give you a brief about the main elements of CircleCI.
Pipelines —
Pipelines are a full set of processes you run when you trigger work on your projects. Pipelines contain workflows, which in turn coordinates to Jobs.
Orbs —
Orbs are snippets of code that help you automate the repeated processes, speed up your project setup, and easy to integrate with third-party tools.
Jobs —
Jobs are building blocks of your Pipelines. Jobs are the collections of steps, which run commands/scripts as required. And each job must have an executor which can be a VM or container.
Executors —
Each job defined in your config will run in a unique executor. Also, the executor can be a Docker container or a virtual machine running Linux, Windows, or macOS.
Steps —
Steps are the set of actions required to complete a Job. Steps are usually a collection of executable commands and there are built-in steps offered by CircleCI that you can use eg. checkout.
Workflows —
Workflows are collections of jobs and it is possible to run these in concurrent, sequentially, or scheduled manner.
Hopefully, by now you must have a sufficient idea about CircleCI to actually set up a CI/CD for your project.
Build ReactJS project on CircleCI Environment
Next, we’ll set up CircleCI for our React project that is a Sample React App and it is on Github (https://github.com/mountainfirefly/search-yc-top-companies).
Later I’ll be hosting a web app to search YC's top companies on this repo, right now it just renders a sample react app.
Create a Heroku app to host the React Project
In this step, we need to create a Heroku application to host React project and we’ll be using the Heroku command line for that.
If you don’t have Heroku CLI on your machine, you can install it by using the below command.
$ npm i -g heroku
You can log in to your Heroku account and that will open a browser to ask for credentials
$ heroku login
Here we are going to deploy this React project using buildpack and if you are not aware of buildpacks, they are just a set of scripts used to compile apps on Heroku. You can read more about buildpacks here.
In our case, we will be using create-react-app-buildpack to deploy the React Project.
$ heroku create yc-top-companies --buildpack https://github.com/mars/create-react-app-buildpack.git
This command will output an URL that belongs to your Heroku app and you can put it in your browser to check if everything is running smooth.
CircleCI Configuration
Now we’ll create CircleCI configuration files for our project and to do so go to your project.
$ cd search-yc-top-companies/
The first thing we need to add is a configuration file that will tell CircleCI how to build our React project. This configuration file needs to be added in .circleci directory in our root of the project and should be named as config.yml .
$ mkdir .circleci
Here is the config.yml
version: 2.1orbs:
  heroku: circleci/heroku@0.0.10jobs:
  build:
    docker:
      - image: circleci/node:10.16.3
    working_directory: ~/search-yc-top-companies
    steps:
      - checkout
      # install dependencies
      - run:
          name: Install Dependencies
          command: npm install
      - run:
          name: Build
          command: npm run buildworkflows:
  heroku_deploy:
    jobs:
      - build
      - heroku/deploy-via-git: # Use the pre-configured job, deploy-via-git
          requires:
            - build
          filters:
            branches:
              only: master
This is a pretty simple config file we have two jobs in it buildand heroku/deploy-via-git .
Once this configuration file creation is complete, now commit and push it to the Github repository.
$ git add .circleci
$ git commit -m "Add circleci configuration"
$ git push origin master
Next, we’ll go to the CircleCI dashboard and perform the below steps:-
- Click
Add Projectsitem on the left menu - Search
search-yc-top-companiesGithub project - Click
Set up Projectbutton on the right side. - Next, it’ll ask you for a branch that contains circleci config and the other option would be to create one. In our case, we already have it so select
master.
Once that is done next we have to link Heroku with CircleCI and for that, you need to add your app name and API key from the Heroku dashboard.
The above details can be found on the Heroku dashboard
- App name is available on the dashboard project listing iteself.
- For API key go to your Account Settings and scroll down to API key section, there you’ll find it.
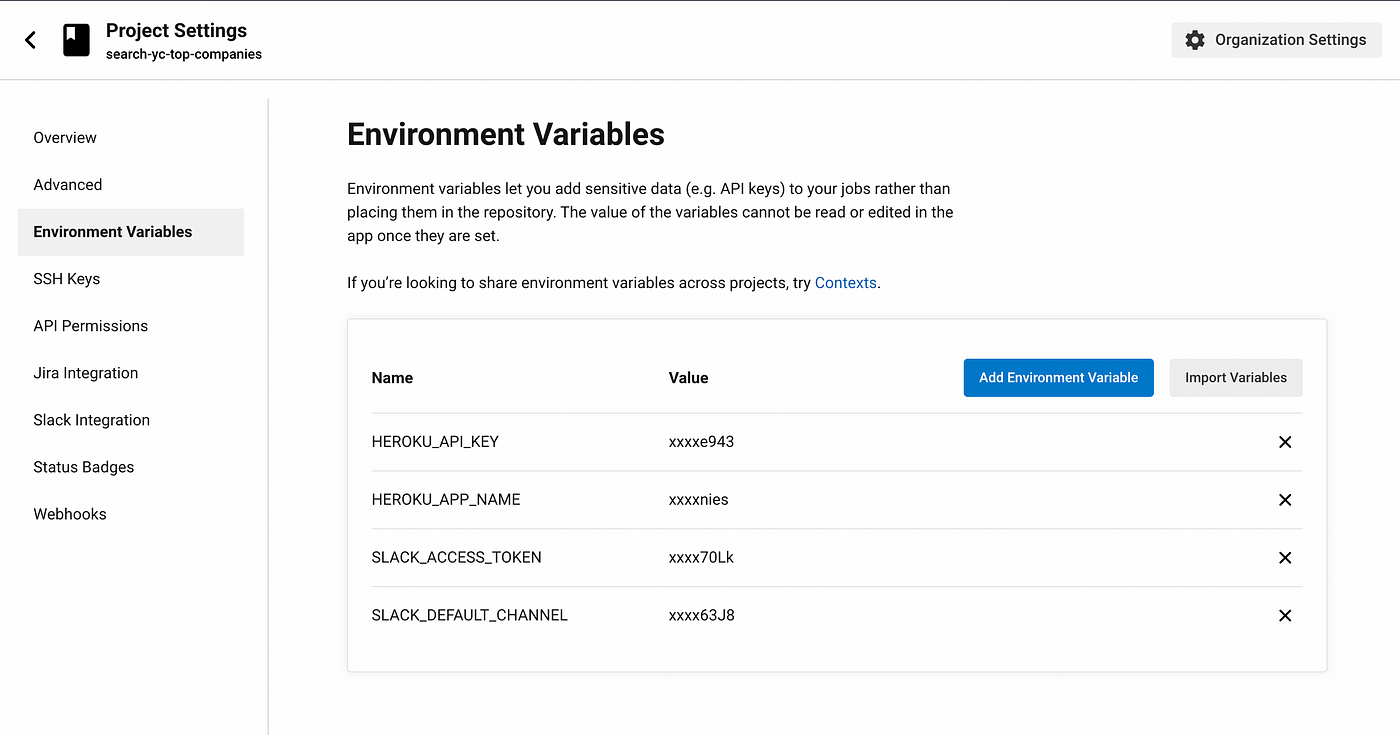
Follow the below steps in order to add these variables to CircleCI Environment variables
- Now go to the CircleCI dashboard
- Click on the
Project Settingsbutton on the right side of the screen under your project. - Select
Environment Variablesmenu on the left. - Click
Add Environment Variablebutton. - For app name, enter name field as
HEROKU_APP_NAMEand in place of value enter your Heroku app name. - For API key, enter name field as
HEROKU_API_KEYand in place of value API key which we have discussed earlier you’ll get it on Heroku in Account settings.
If you have followed the above steps correctly all should be fine ?.
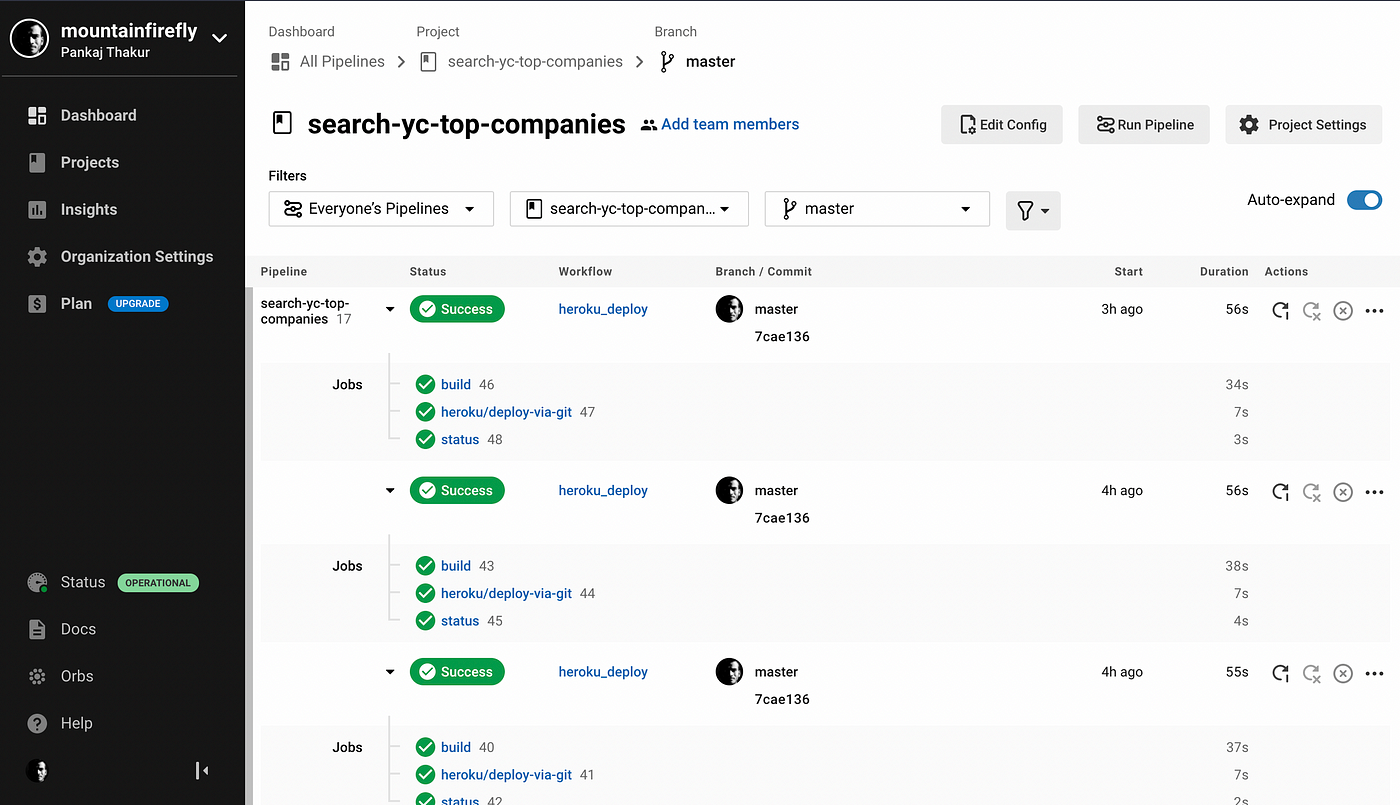
Now go to your CircleCI project and click Run Pipeline after it completes successfully, open your Heroku app URL and you’ll see a sample react app running there.
Now is time to experience the power of Continuous Integration and Continuous Deployment, go to your react project on your local machine and make a change then push it to GitHub.
If you are on the CircleCI dashboard you’ll see the pipeline getting triggered automatically and after a while, the Heroku app should be updated with the latest changes you have made on your local machine.
I hope you guys have enjoyed this article as I have enjoyed writing it.
I’ll be writing a follow-up article for this where we’ll integrating Slack and getting notifications for build deployment status.
Stay tuned, we’ll be posting more articles like this once a while, also you can check my website mountainfirefly.dev where I have written a lot of articles like this.
You can ping me on Twitter @mountainfirefly if you face any issues while following this article.
Thanks for Reading!!